Please watch the following video on how to create & manage Tasks in your SiteConnect account:
Please note that this video was recorded before our latest software update so some visual aspects may differ in the current web portal
Creating & Managing Tasks (4:41)
If you still require assistance after watching then please keep on reading...
Index:
- Tasks Menu
- Creating and Assigning a Task
- Viewing and closing Tasks
- Adding notes to a Task
- Editing a Task
- Deleting a Task
- Exporting Tasks
You can also bulk import tasks. Click here for the training guide.
Tasks Menu
On the left hand side main menu of your SiteConnect web portal please go to the Tasks tab
Creating and assigning a Task
From here you will see the below screen. Click on Add Task to create a task.

A dialog box will appear as shown below, where you'll be able to enter the following information:
- Task name (compulsory field)
- Task Type (dropdown selector)
- Description
- Due Date (can be selected by clicking the calendar icon on the right hand side)
- Priority Level (select from Low, Medium, High or Critical via dropdown menu)
- Site (you can select the site that the task applies to if applicable)
- Users (select the user(s) that you want to assign the task to)
- Browse files (you can upload any applicable photos or documents)
Once you have populated all the fields, click on Save.
You can also choose to toggle on Individual Tasks for each Selected User. If you toggle this option on each user the task is assigned to will need to complete the task. If you leave it toggled off then the first person to complete the task closes the task.

An email notification will be sent to each User the task is assigned to & it will display in the Tasks menu on the Home screen of the App. They will also be sent weekly reminders via email on Monday mornings for incomplete tasks.
Once assigned the task will display in your list of Tasks.

Viewing and closing Tasks
In the task list you will see all your tasks, which will either be in an open or completed status. The assignees can close the tasks via the Mobile App or you can manually close them in the Web Portal by clicking on the Status toggle button.

You can also choose to View, Edit or Delete the Task.
![]()
View will bring up information around the Task including the date it was created and updated.

Adding notes to a task
You can add Notes to the task by clicking on the Notes tab up the top of the Task Viewer or Editor screen.

Type in your notes and click on Save once completed.

Editing a task
Editing the task will bring up the Task creation dialog box where you can update the information and details for that Task.
Deleting a task
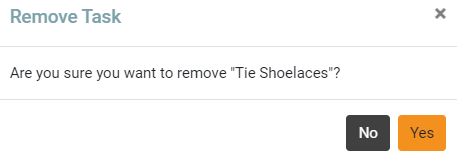
To delete a Task click on the Delete button to the right of the relevant task

The below dialog box will display. Click on Yes to delete the task or No to go back
Exporting Tasks
You can Export your Tasks as a CSV, PDF or XLSX file by clicking on the List Menu/Export button next to Add Task, which will export all tasks.
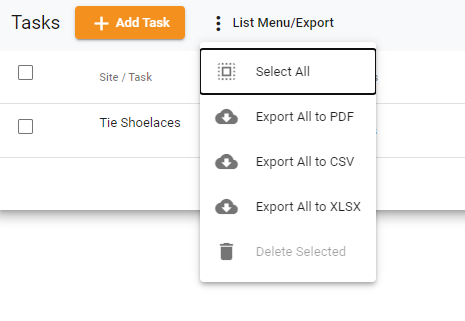
If you want to export selected tasks then click in the box to the right of the task(s) you want to export and it will only export the selected tasks.

If you need any further help or have any questions, please contact your regional support team:
- New Zealand (NZ):
📧 support@siteconnect.io
📞 +64 800 748 763 - Australia (AU):
📧 support@siteconnect.io
📞 +61 1300 637 183 - United Kingdom (UK):
📧 support.uk@siteconnect.io
📞 +44 333 043 5727