Please watch the following video:
Projects/Sites (2.04)
Please scroll down for further information...
Index:
- Adding a new Project
- Editing & Managing your Projects
- Viewing & Adding individual Sites to a Project
- Signing in employees with your Projects or Sites
Click here for information on how to enable/disable notifications for your Projects/Sites
Adding a New Project
With this new feature, Sites can be grouped together and placed under one parent Project. If a number of your Sites are all related to the one Project this is a great opportunity for you to group these all together.
To add a new Project to your account, click on the Projects tab on the left hand side menu

Then click on the Add button at the top of the list that appears

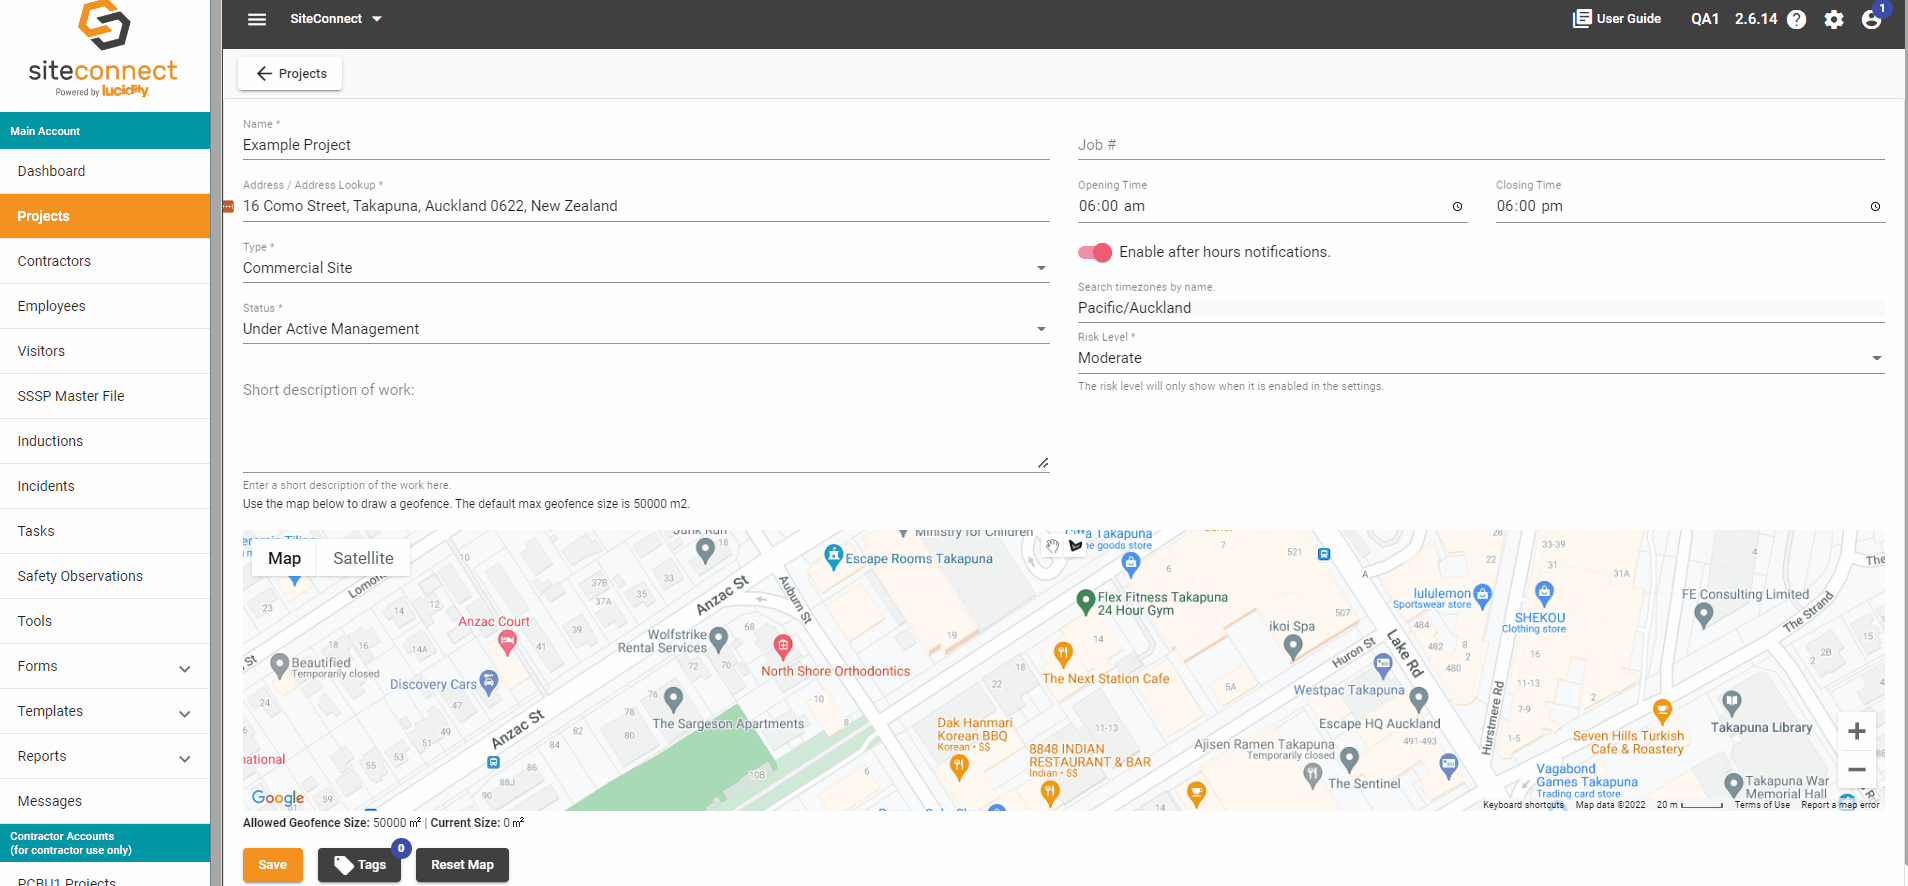
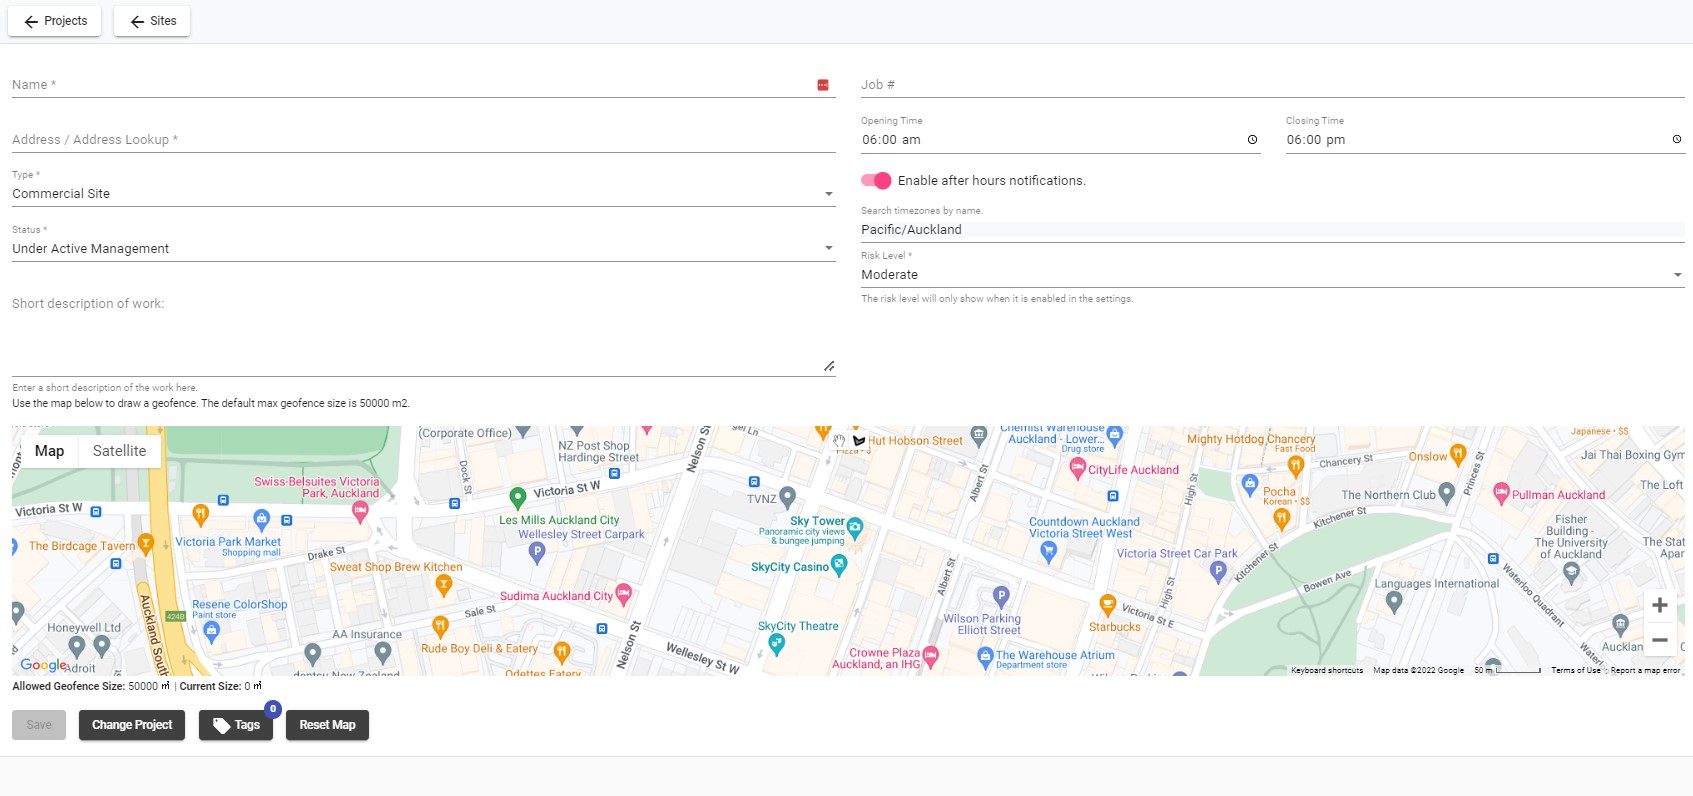
This will take you to a screen where you will fill out the following details
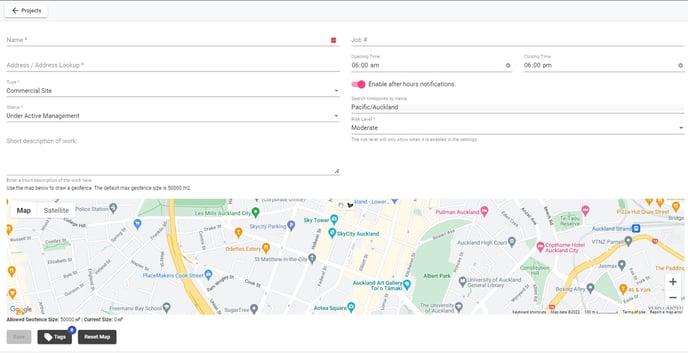
- Name
- Address
- Type- click the dropdown to select the type of project
- Status
Please note that the Pre-Construction & Archived statuses will NOT allow site sign ins via GPS or QR code as it is deemed there is no one physically on site. To allow people to sign into any related Sites for this Project, you will need to ensure the site is in an active status which are: under construction, hand over complete, under active management or maintenance.
- Short description of work (optional)
- Job # (optional)
- Opening Time & Closing Time- will notify any staff still signed in onsite after closing time to sign out and will send notifications to the relevant personnel if still signed into site 1.25 hours after closing time
- Timezone
- Risk Level- choose between Low- Critical Risk levels
Once you have filled in all relevant Project information, you will also be able to set up a GPS geofence for the Project by clicking and drawing on the map and joining the co-ordinates together.
For more information on using GPS Geofencing to sign people in & out please refer to this article
You can also add any relevant Tags to your Project or Reset the Map so that you can start drawing your Geofence again.
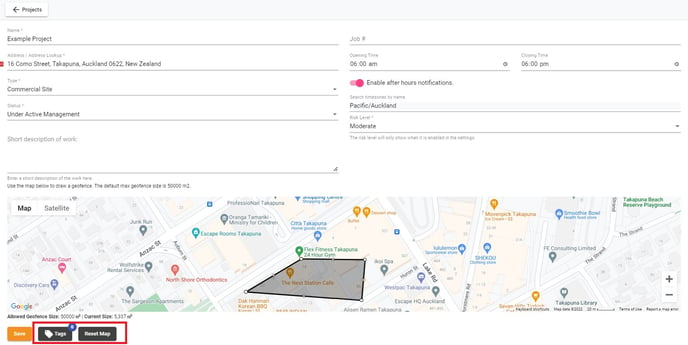
Once you have entered all the relevant information for your Project hit the Save button down the bottom.

You will then be able to see your new project in your Projects list

Editing & Managing your Projects
To edit your Project, click on the Edit prompt on the left-hand side of the list for that specific Project

You will also be able to View your Project, Delete it entirely or Clone it (create a identical copy) from this menu
When editing a Project, you will be able to update the details you entered when creating the Project as well as manage the options on the right-hand side of the screen
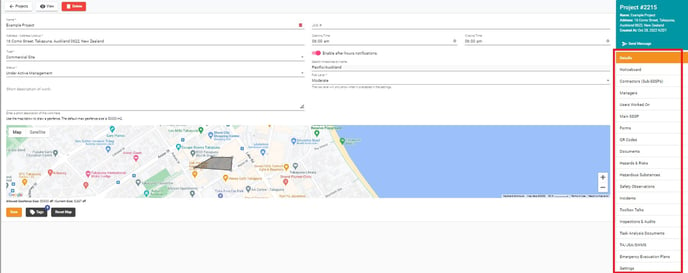
From this menu you will be able to manage the following:
- Noticeboard- create a noticeboard message that is displayed when a user signs into any Sites related to this Project. For more information, please see this article
- Contractors (Sub SSSP's)- view and add any related contractor companies for this project and also view/add any Project specific SSSP documents that the contractor has provided. For more information please see this article
- Managers- add Project/Site Managers to this Project from your connected network who then receive any notifications relating to that Project going forward. For more information on this, please see this article
- Users Worked On- Any users who have signed into this project or any related sites will be displayed here. You can also add any Users to this menu by clicking Add User
- Main SSSP- create a primary SSSP which you can then export into a full report based on information entered form the other tabs in the Edit menu. For more information please see this article
- Forms- Any Site forms that you have created and assigned to this Project will be displayed here
- QR Codes- Create and associate QR codes to this project so that users can scan these either with the SiteConnect Mobile App or their phone camera and sign into Site
- Documents- Any Project specific documents can be added here and become visible to anyone signed into Site using the Mobile App
- Hazards & Risks- any Hazards/Risks associated with this Project will be visible here and within the SiteConnect Moblie App. You can also add Hazards from your account's overall Hazard register here by clicking Copy Templates or create a new one from scratch for this Project
- Hazardous Substances- any Hazardous Substances associated with this Project will be visible here and within the SiteConnect Mobile App. You can also add Hazardous Substances by creating a new one from scratch for this Project
- Safety Observations- Any Safety Observations reported for this Project will be visible in this list. You can also add a new Safety observation to this Project from here
- Incidents- Any Incidents reported for this Project will be visible in this list. You can also add a new Incident to this Project from here
- Toolbox Talks- Any Toolbox Talks that have taken place/recorded within this Project will be visible in this list. You can also add a new Toolbox Talk record to this Project from here
- Inspections & Audits- Any Inspections completed for this Project from the mobile app will be visible here and within the SiteConnect Mobile App.
- Task Analysis Documents- Any Task Analysis documents related to your Project can be added here for anyone to then view when signed into this Project via the Mobile App
- TA/JSA/SWMS- Any assigned Task Analysis can be created for this Project and will then be visible on here. For more information, please see this article
- Emergency Evacuation Plans- An emergency evacuation plan can be set up with this option which can then be logged against this Project. For more information on this, please see this article
- Settings- In the Settings page, you can:
a) Enable/disable the After Hours Notifications
b) Enable/Disable Auto project/site sign out - this setting allows users to either stay signed into the site they previously signed into or to be signed out of the site they were previously signed into.
c) Select your 'site access options' for anyone signing into your site that is not connected with your network; and
d) Select if you want the Site Risk Assessment level to display on the Mobile App
Click here for the link to notifications for Projects/Sites
Viewing & Adding Individual Sites to a Project
To add individual Sites to any Project you have in your account, find the Project that you want to add the Site to, then click Sites on the left hand side of that entry in the list.
![]()
This will bring up a list of Sites associated with that Project. Click on the Add button up the top to add a new Site to this Project from scratch

You can also import Sites directly from a CSV UTF-8 (comma delimited) file to any Project. Contact us at siteconnectsupport@sitesoft.com or Ph: 0800748763 for more information on what is needing to be included within the CSV file
This will bring up the Site editor which follows the same steps as the Project editor.
Any information entered into your child site will be displayed within the Mobile App in conjunction with the Project information
Once your Site has been saved it will appear in the Sites list for this specific Project.

Signing workers in and out of site for your Projects and/or Sites
With this new functionality, signing your workers in and out of site will work differently if you add child sites to your Project.
If you are ONLY using Projects and NO child sites, then signing in and out of site will work as normal either through the GPS geofence or the QR Code
If you are adding child sites to a Project then there are two recommended ways that you can set this up:
- GPS Geofence or set up a Sign in/Sign Out QR Code for the entire project, which your workers will sign in and out through. You can then set up a Location QR code for the individual Sites , which records where that person is located within the Project (the user only needs to scan the Location QR code once to record their location). The Location QR code is NOT a sign in and out method, it is purely to locate which site the person is on within the Project.


This option allows your workers to sign in and out of your entire project but still be able to see what site within that project they were working on.
2. Do NOT GPS geofence or set up sign in/out QR codes for the Project and instead set up GPS geofences or sign in/out QR codes for each child site. By doing it this way, you are not tracking the sign in and outs for the Project as a whole and are only tracking the sign in/outs for each child site.
Please note that the Project that the Site relates to will still be visible to you when viewing a sign in record from your dashboard

If you need any further help or have any questions please contact the support team by email siteconnectsupport@sitesoft.com or Ph: 0800 748 763