.png?width=161&height=26&name=SiteConnect%20Logos%20(LinkedIn%20Post).png)
Set up the Asset Register in a planned sequence so your records are consistent and useful to site teams. Use this article to plan the setup sequence.
At a glance
|
For |
Company administrators and Asset Register owners |
| Platform | Web Portal |
| Applies to | All regions |
| Time to Read | About 2 minutes |
| You’ll learn how to |
• Assign responsibility for the Asset Register. |
Before you begin
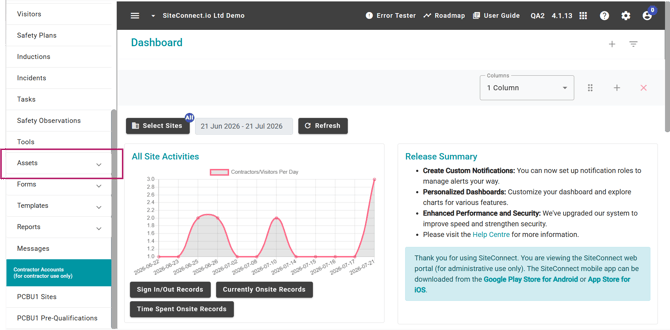
You need administrator access to Assets through your role permissions. If Assets is not visible, ask your SiteConnect administrator to update your access.
Recommended setup sequence
1. Assign ownership
Agree who owns each part of the register. Finance managers may manage fixed-asset values, while plant or office managers usually manage servicing, deployment and operational records. Site managers, foremen and safety officers can provide updates.
2. Plan your classification structure
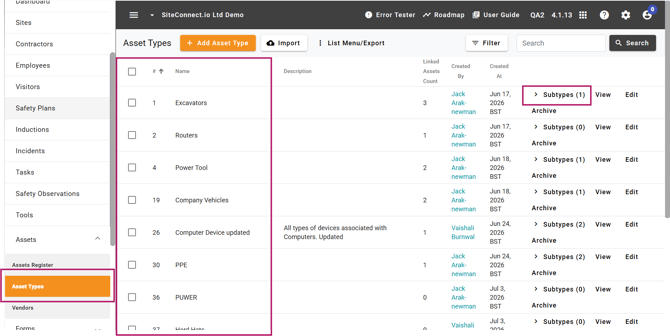
Plan your Asset Types and Subtypes in a spreadsheet or simple flowchart. Avoid separate types for every make, model or item. For example, use Heavy Machinery as the type and Excavator as the subtype. Asset Types support a two-level structure, with subtypes sitting beneath a parent type.
3. Prepare and add your records
Create a complete spreadsheet, agree a naming convention and decide whether to add the assets manually or import them.
Note
Adding more than five assets? If so, we recommend using the CSV import. Create your Asset Types and Subtypes first so the import does not create new classifications from the file.
For a step-by-step guide on how to import your asset data into SiteConnect via CSV, see How do I import assets from a CSV file?
4. Complete the operational setup
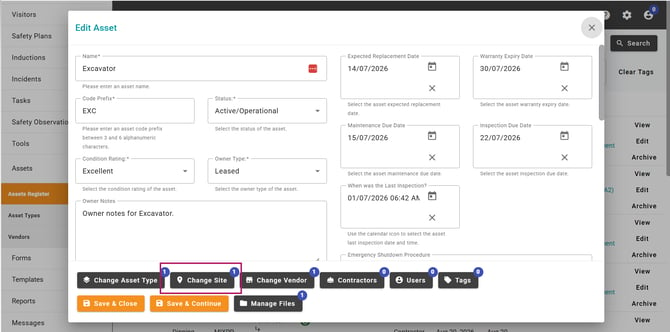
Link each asset to the correct site after creation or import and attach a photo of the asset so that it can easily be identified. Add the dates needed for maintenance, inspection, warranty and replacement reminders, then decide which assets need to appear in the Mobile App.
5. Review before rollout
Check that every asset is set with the relevant status, linked to the correct site and contains the ownership information and dates your team needs. Agree who updates records when assets move, are serviced or reach the end of their lifecycle.
Next recommended step
Prepare the information for your Asset Register. Turn your setup plan into a complete source spreadsheet before creating records. Collect each asset’s name, classification, ownership, site, status, condition and relevant lifecycle dates so assets can be added consistently and linked to the right operational workflows.
Preparing this information first reduces incomplete records, duplicate classifications and rework during manual entry or CSV import.
Next article: What information should I collect before adding assets?