Index:
- How to create a hazard
- Entering name and description of hazard
- How to verify a hazard
- How to do an initial risk assessment
- How to upload your Risk Matrix and Risk Controls definitions
- How to enter controls for a hazard
- How to enter a residual risk assessment
- How to copy a hazard to your sites
- How to add media to a hazard
- How to archive a hazard
- How to manage your hazards from your sites
- How to export a list of reported hazards for sites
Please watch the following video on how to create and manage Hazards/Risks in your SiteConnect web portal:
Creating & Managing Hazards/Risks (5:37)
If you still require assistance after watching then please keep on reading...
How to create a Hazard/Risk
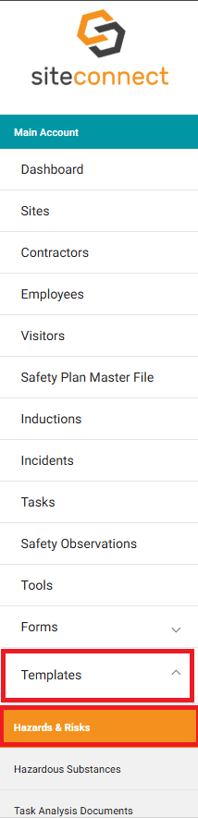
Once you have clicked on Templates you will be presented with a list of template options. Choose and click on Hazards & Risks. Once you click on Hazards & Risks a list of hazard templates that have previously been loaded will appear on the right.
To create a new Hazard click on the +Add button.

This will open up a new dialog box where you will be required to enter all relative details for the hazard.
Entering Name and Description of Hazard
Enter the name of the Hazard/Risk and the description in the fields as indicated below.

How to select if a hazard/risk is significant or not
Significant hazard means a hazard that is an actual or potential cause or source of serious harm or death; or harm (being harm that is more than trivial) the severity of whose effects on any person depend (entirely or among other things) on the extent or frequency of the person’s exposure to the hazard; or harm that does not usually occur, or usually is not easily detectable, until a significant time after exposure to the hazard.
Click in the box to the left if a Hazard/Risk is significant (do NOT click if it is NOT significant).

How to Verify a Hazard
You are then given the option to Verify the hazard via the Status dropdown. To Verify the hazard click on the drop down arrow on the right-hand side.
You can Verify the hazard at any stage. The Hazard does not need to be verified when creating the hazard.

This will bring up a drop down box where you can chose to either verify or unverify the hazard. Click on the applicable option.

How to do an initial Risk Assessment
You will then be required to give an initial risk assessment for the hazard. To do this you click on the Initial Risk Matrix button.

This will open the Initial Risk Matrix. From there, you can assess the initial risk level by selecting the appropriate option based on the likelihood and severity of the hazard or risk. Once you have selected the appropriate risk level click on Use Risk Level.

Once you have selected the Risk Level chosen this will give you your Initial Risk Assessment rating for this hazard, which will be either Very Low, Low, Moderate, High or Extreme and will show in a band below the Initial Risk Assessment dialog box.

How to upload your Risk Matrix and Risk Controls definitions
SiteConnect allows each organisation to upload images of its own internal Risk Matrix and Risk Control definitions. These images are available to users while creating or reviewing a Hazard/Risk assessment, providing guidance on how to determine the appropriate risk rating and select suitable controls for each identified hazard or risk.
To upload your internal Risk Matrix and Risk Control Definitions, click the cogwheel in the top-right corner of your web portal, then select Configuration.

This opens your Account Configuration settings. Under Account Configuration, locate the Hazards & Risks section. There you will see a black button labelled Upload Risk Matrix Definition Image, and below it another black button labelled Upload Risk Controls Definition Image. Click the relevant button and select the file you want to upload from your browser.

Then click on Select & Upload Image and select the file you want to upload from your browser.

Once uploaded, the Risk Matrix definition will be available during Hazard/Risk assessment by clicking either the Initial or Residual Risk Matrix button.

And then clicking the View Risk Matrix Definition button.

The Risk Controls definition will be available when you are selecting Controls for a Hazard/Risk by clicking the Hierarchy of Controls button.

And then clicking the View Risk Controls Definition button.

Your Risk Matrix Definition image and your Risk Controls Definition image will appear at the bottom of all PDF exports of your Hazard & Risk Register, as well as on any PDF exports of TA/JSA/SWMS/RAMS.
How to enter Controls for a Hazard/Risk
You will then be required to enter the Controls for this hazard. Click on Add Control and enter the control(s) for this hazard.
You can enter as many Controls as you like for each hazard. Simply keep clicking on the '+' Button and another Hazard Control dialog box will open up

Once you have entered the details of the control you will need to enter the Levels of Control.

Click on the drop down arrow and chose from the list of options.
You can delete a Hazard/Risk Control at any time by clicking on the rubbish bin symbol to the right-hand side of the Level of Control option
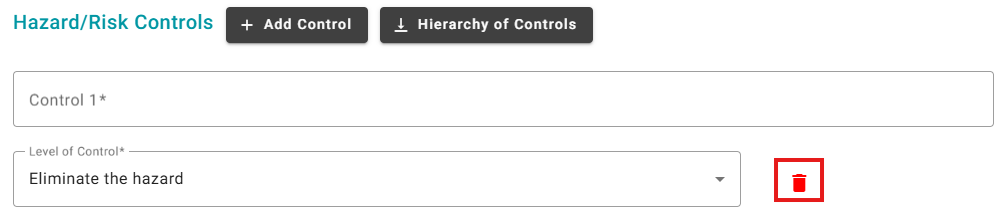
For guidance on selecting the appropriate Level of Control, click Hierarchy of Controls. This will open a dialog box that explains each control level and provides guidance on how to assess and select the most appropriate option.


How to enter a Residual Risk Assessment
Once you have completed entering the controls you will then be required to do a Residual Risk Assessment for the hazard. To do this you click on the Residual Risk Matrix button; just as you did for the Initial Risk Assessment.
![]()

Once you have chosen the Likelihood and Severity options this will give you your Residual Risk Assessment rating for this hazard, which will be either Very Low, Low, Moderate, High or Extreme and will show in a band below the Residual Risk Assessment dialog box.

After you have completed this click on Save at the bottom of the dialogue box to create the first draft. Upon saving you will be able to select a review date for the Hazard/Risk.

How to copy a Hazard/Risk to your Sites
You can then copy this Hazard/Risk to all sites or copy to individual sites. To copy to all sites click on the Select all Sites Button. By doing this you are adding this Hazard/Risk to ALL sites within your system and you don't need to do anything further.
![]()
To copy to individual sites click on the Copy to Sites Button. Once you click on this Button a list of all your sites will appear.
![]()
Click on the sites you wish to copy this Hazard/Risk to. On the top at the left you will see the number of sites that you have applied this hazard to. Once you have chosen all the sites you want to apply this hazard to then click on Select and Close on the bottom right-hand side of the screen.

How to add a file to a Hazard/Risk
If you want to add a file to this hazard/risk, i.e. a picture of the hazard you can do this by clicking on the Manage Files Button. This will open up a dialog box so you can download files from your computer or the internet.
![]()
How to select a Reviewer to a Hazard/Risk
You can assign a networked user to review the Hazard/Risk by clicking the Select Reviewer button. This will open a list of available networked users. Find the user you want to assign and click Select next to their name to add them as the reviewer.
![]()

How to archive a Hazard/Risk
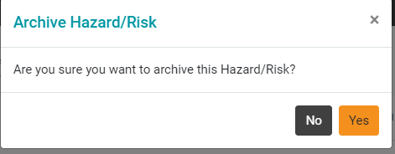
If you wish to delete this hazard you will need to archive it. You can do this by clicking on the Archive This Hazard button to the right of the screen.
![]()
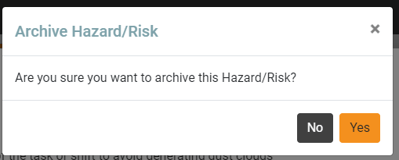
Once you click on Archive this Hazard a dialog box will appear asking you to confirm that you want to delete this hazard. If you are sure click on Yes. This will archive the Hazard/Risk so that it is now not visible to all sites that it was applied to.
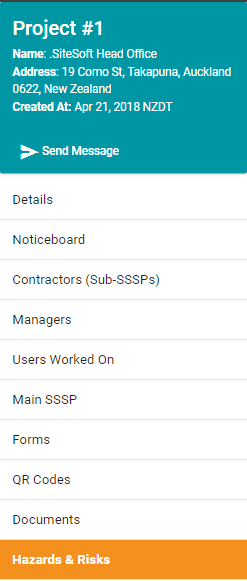
How to manage your hazards from your Sites
Go the main menu and click on Sites. A list of all your sites will appear. Click on the Site that you wish to add the hazard to. Then click on Edit for that site on the right-hand side of the screen.
You can only manage one Hazard at a time through the site feature. If you want to add the hazard to multiple sites you are best to do this through the Hazard Template
-1.webp?width=670&height=60&name=Edit%20projects%20(1)-1.webp)
The details and features for the chosen site will appear. Check you have the right site and then click on Hazards & Risks.
The list of Hazards that are already associated to that Site will appear. You can either add a New Hazard by clicking on the New Hazard Button or you can copy existing hazards to this site.

To copy existing Hazards to this Site click on the Copy from Templates Button. This will give you the option to Select from Templates or Copy all Templates. If you click on Copy all Templates this will automatically upload all your Hazard Templates.

If you want to select certain templates then click on Select from Templates. This will list all the available templates. You can click on the ones you want and then click on Save and Close.

If you wish to remove a hazard from a specific site then click on the Archive Button next to the hazard you want to delete.

A dialog box will appear asking you to confirm that you want to Archive the Hazard from this Site. If you are sure then click on Yes. This will unlink the hazard from this site only.
How to export a list of reported hazards for sites
-
Go to the Hazards & Risks templates tab at account level.
-
Open the filters tab and manually select all sites. Although the button may initially show “All,” that’s not accurate — you must select each site using the site selector.
-
Once applied, the Site column should display the selected site names.
-
Click on the Menu above the list and choose Export all to CSV.
-
This will export all hazards and risks from the selected sites to a CSV file, which you can then filter or sort by site name to group the hazards accordingly.

If you need any further help or have any questions, please contact your regional support team:
- New Zealand (NZ):
📧 support@siteconnect.io
📞 +64 800 748 763 - Australia (AU):
📧 support@siteconnect.io
📞 +61 1300 637 183 - United Kingdom (UK):
📧 support.uk@siteconnect.io
📞 +44 333 043 5727