Completing TA/JSA/SWMS in the mobile app
Here you will learn how to complete a Task Analysis or TA/JSA/SWMS inside the mobile app
Index:
Please watch the following video which is a basic run-through on the TA/JSA/SWMS feature within the new mobile app
TA/JSA/SWMS (4.20)
Also please scroll down the article for further information:
Accessing & Completing a Task Analysis via the mobile app
To access a Task Analysis on the SiteConnect Mobile app, log in and go to the three horizontal lines on the upper right hand corner, then click TA/JSA/SWMS in the menu that appears.
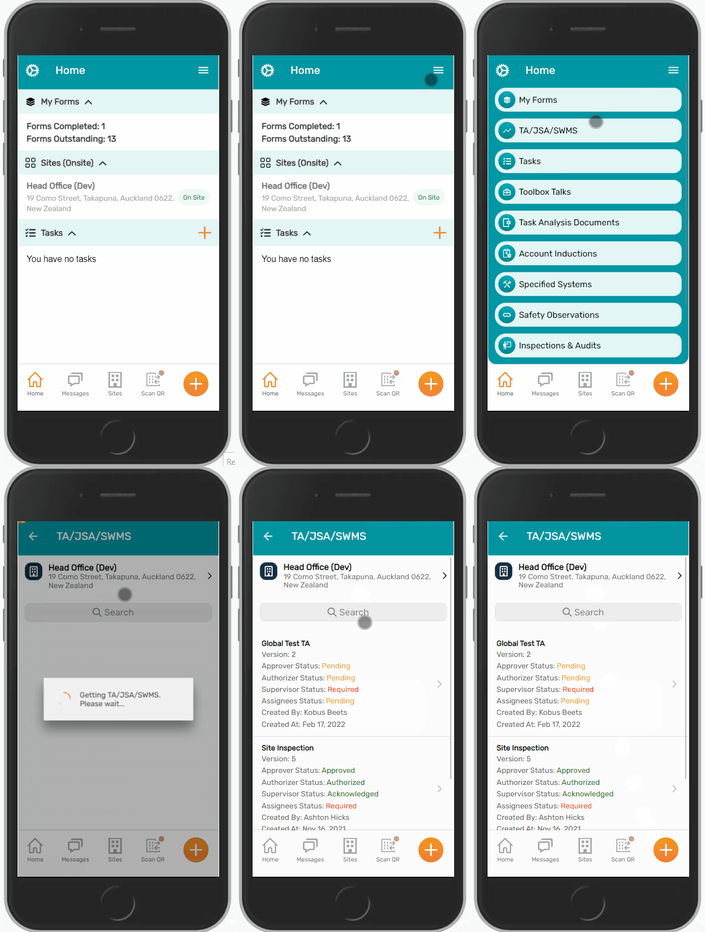
You can then select the Site that this is relevant to by clicking the Site heading up the top of the page.
This will auto default to the Site that you are currently signed into.
To change the Site the TA/JSA/SWMS is for, please click the Site description at the very top of the page and then select the appropriate Site via scrolling or directly searching for it.
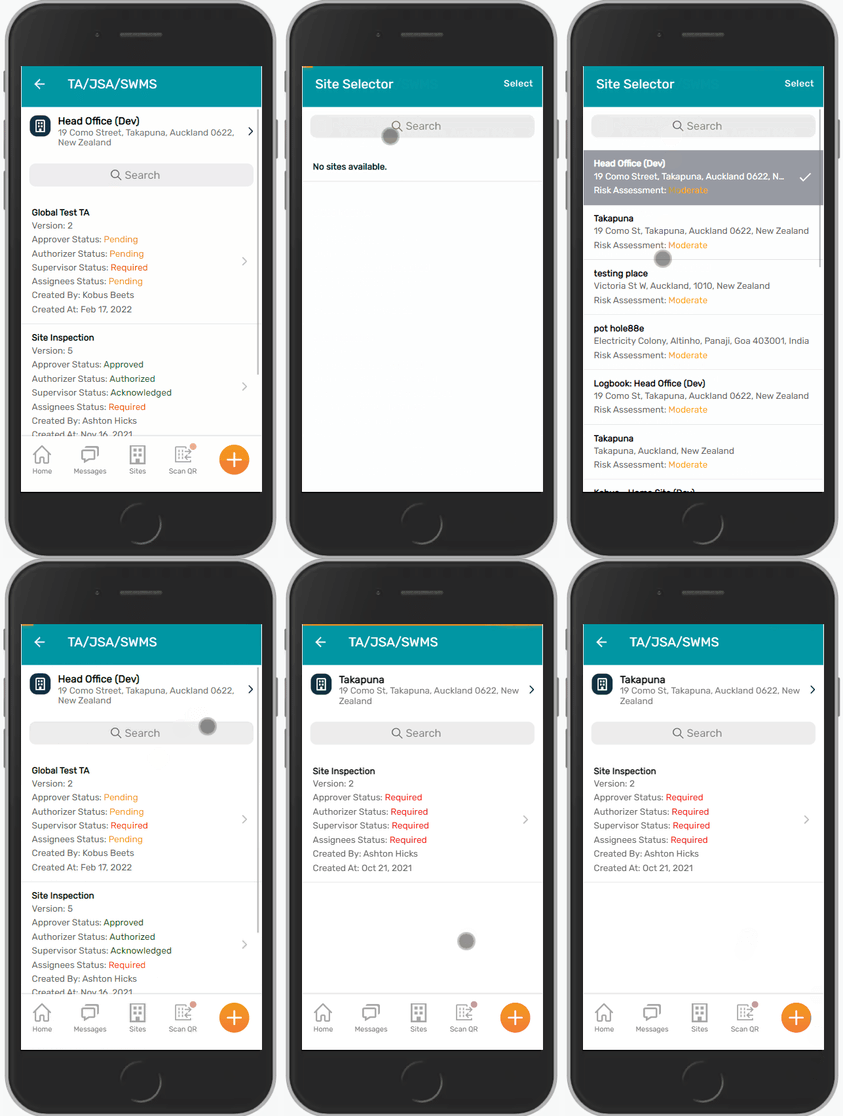
If there are TA's assigned to that Site, they will then appear on this list like so.
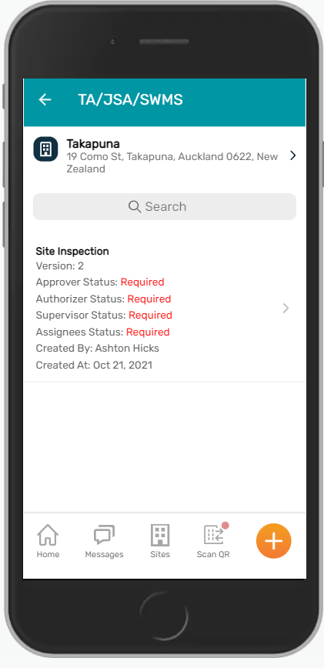
If you are have been assigned as a Approver, Authorizer, Supervisor or an Assignee for this TA, the this will flash Required next to the position that you have been assigned.
Pending means that somebody else has been assigned this role and has yet to fulfill this.
To complete the TA, just click this TA in this list to access it. Then read through the TA and work through any steps that have been outlined. You can scroll down and access each item via dropdown items near the bottom of the page.
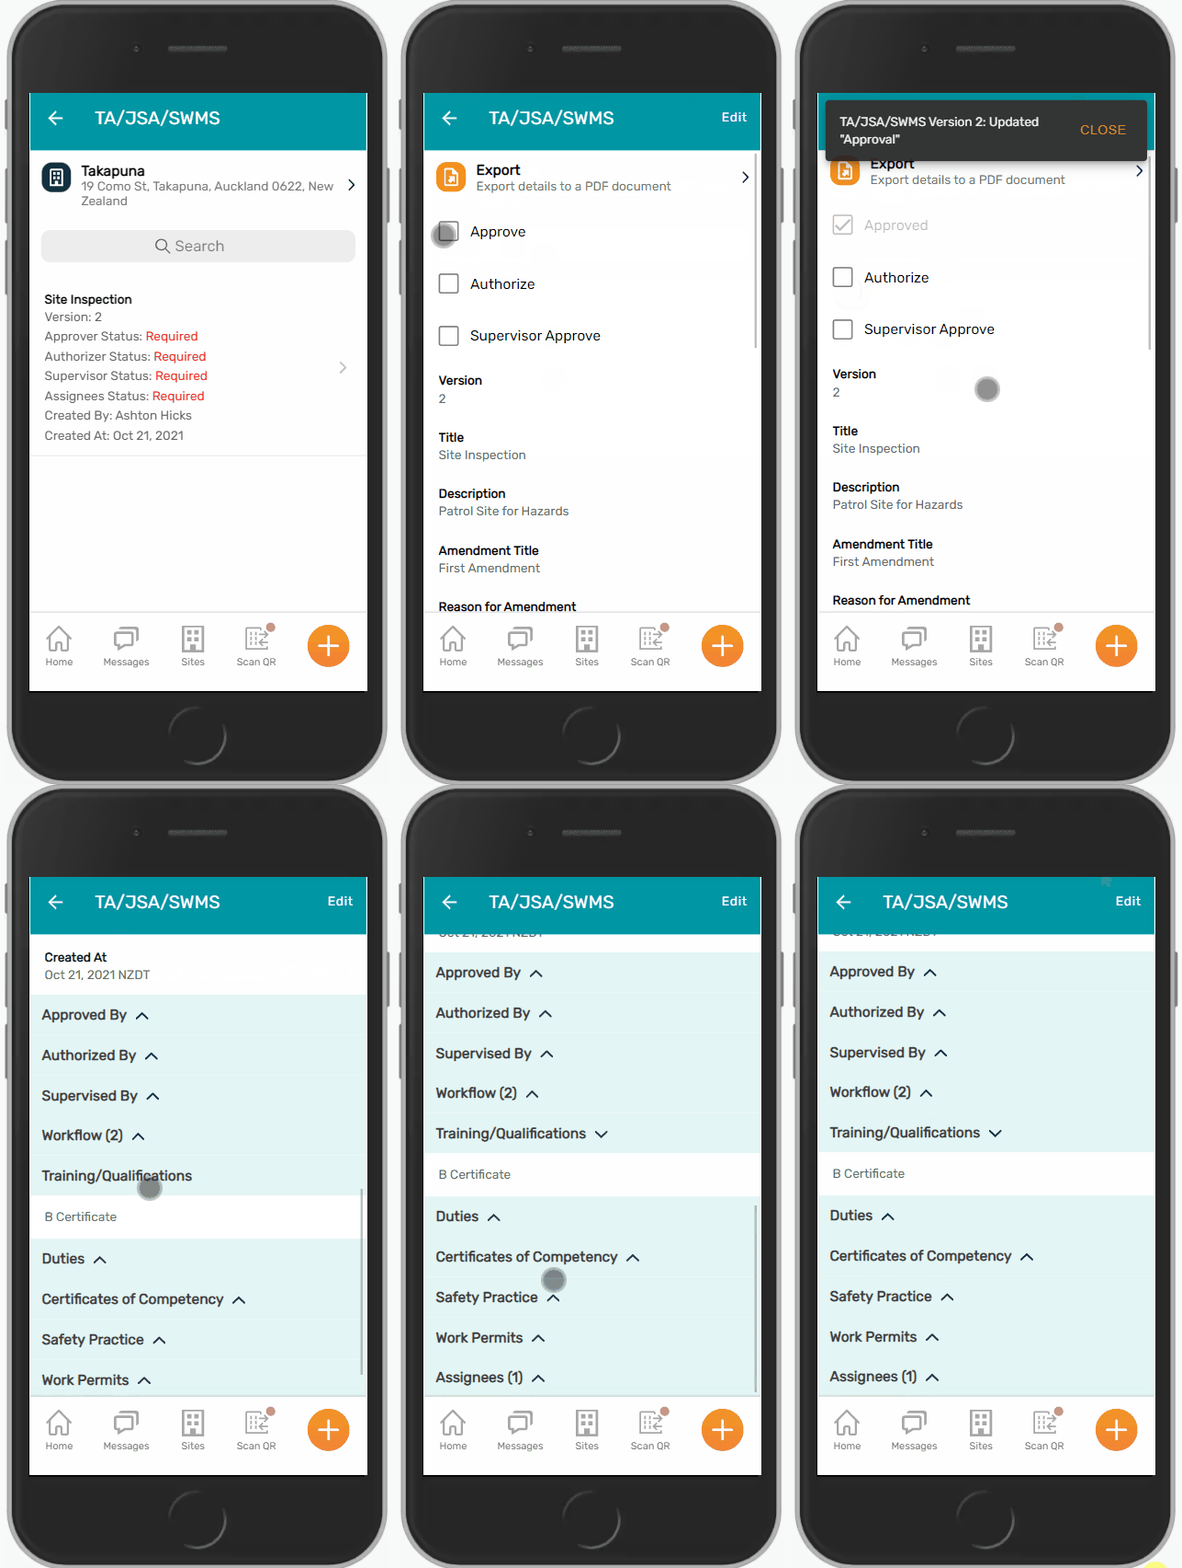
Once completed, you can click Approve, Authorize or Acknowledge at the top of the TA (depending on what role you have been assigned via your account admins).
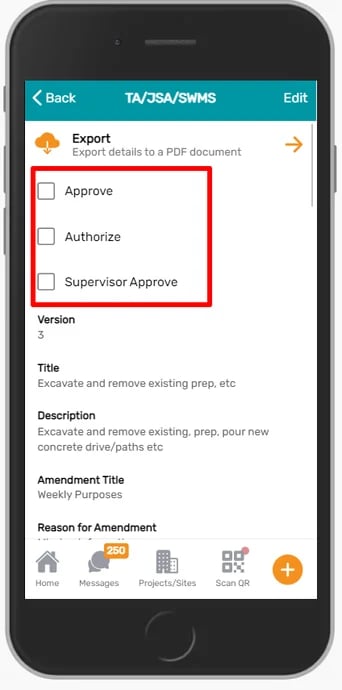
If you have just been assigned this TA to complete and the other appointed staff members have not Authorized and Approved the TA yet, you will not be able to acknowledge (or edit) this TA until this has been done.
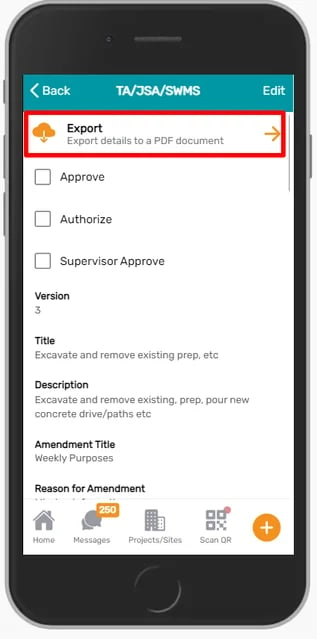
You can also export the TA to a PDF via the Export prompt at the top of this page.
When you check this TA again for this Site, you will now see that instead of flashing as Required it will now be Green and reflect what you have just done (again depending on your assigned role)
This will also be visible for your account admins in their web portal accounts.
Please note that if your admins have created a new version of this TA then progress will reset so you will need to Approve, Authorize or Acknowledge this again.
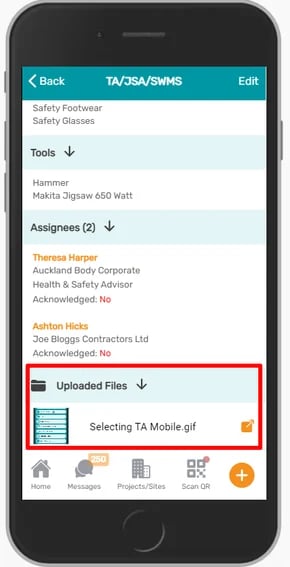
Some TA's may also have uploaded files that you can view. You will see these down the bottom of the TA in a dropdown item.
Editing a TA
When you are viewing a TA within the mobile app, you can also edit it by clicking Edit in the upper right hand corner.
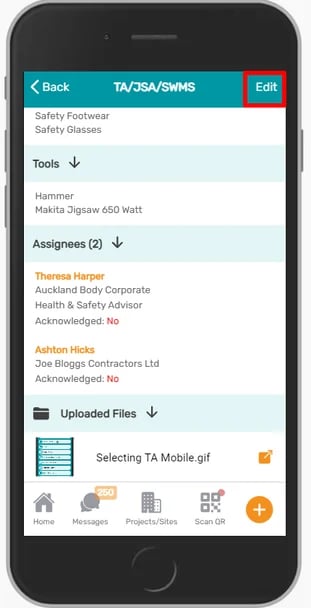
From here you will be able to edit the content of this TA by clicking in each field and filling in your own information.
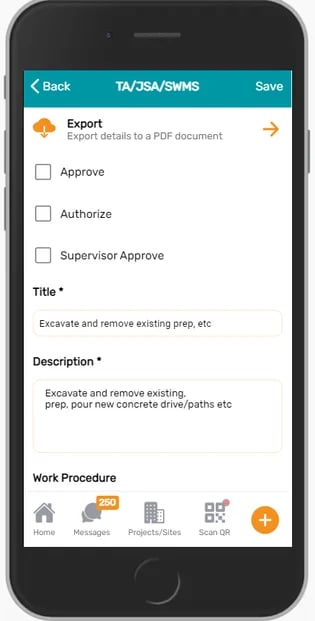
Once you have finished editing the TA you can then Save it by clicking the Save prompt in the upper right hand corner.
Once you have Saved your edited TA (or have updated/removed a workflow step) you will have created a NEW VERSION of this TA.
Because of this, you will now be prompted to add an Amendment Title and a reason for the amendment which will be visible to your account admins. These are compulsory to fill in as highlighted by the asterisks.
This will also mean that it will need to be Approved, Authorized and Acknowledged by whoever is responsible for this.
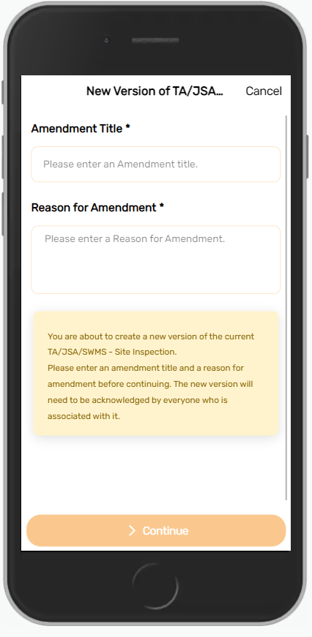
Once you have filled these out you can click Continue and this will create this new version of the TA which will then replace the original one. This version one will also be present in the My Forms list when you reenter this.
Workflows
Some TA's will also have Workflows if you scroll down in them which are step by step breakdowns of the task itself. Click on each step to enlarge it and see all relevant information
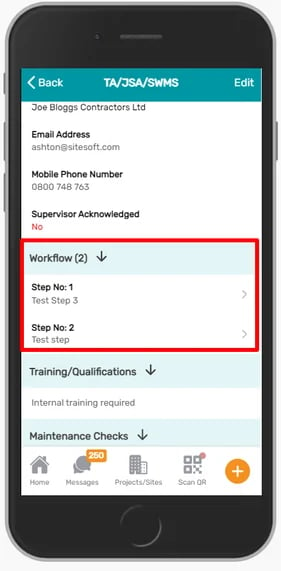
You can also Edit Workflow steps or Remove them entirely by clicking Edit on the upper right hand corner of the TA (once it has been Approved and Authorized), then scrolling down to the workflow field and clicking the relevant option.
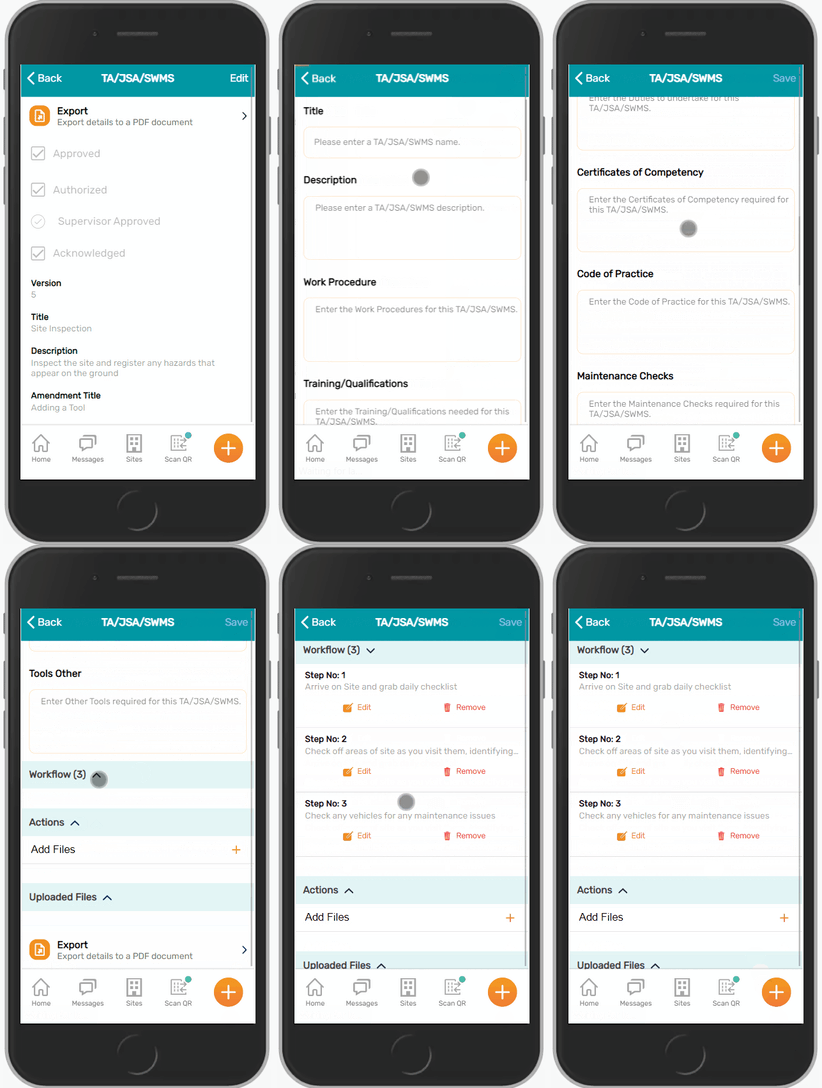
When editing a Workflow, you will also be asked to add an amendment title as this creates a new Version much like editing the TA as a whole in the previous section of this article.
Task Analysis Documents
You can also view Task Analysis Documents by going back to the three horizontal lines on the upper right hand corner and pressing Task Analysis Documents in this menu. Then selecting the correct Site up the top.
This will auto default to the Site that you are currently signed into.
To change the Site the Task Analysis Document is for, please click the Site description at the very top of the page and then select the appropriate Site via scrolling or directly searching for it.
Then just click on the relevant document that you wish to view
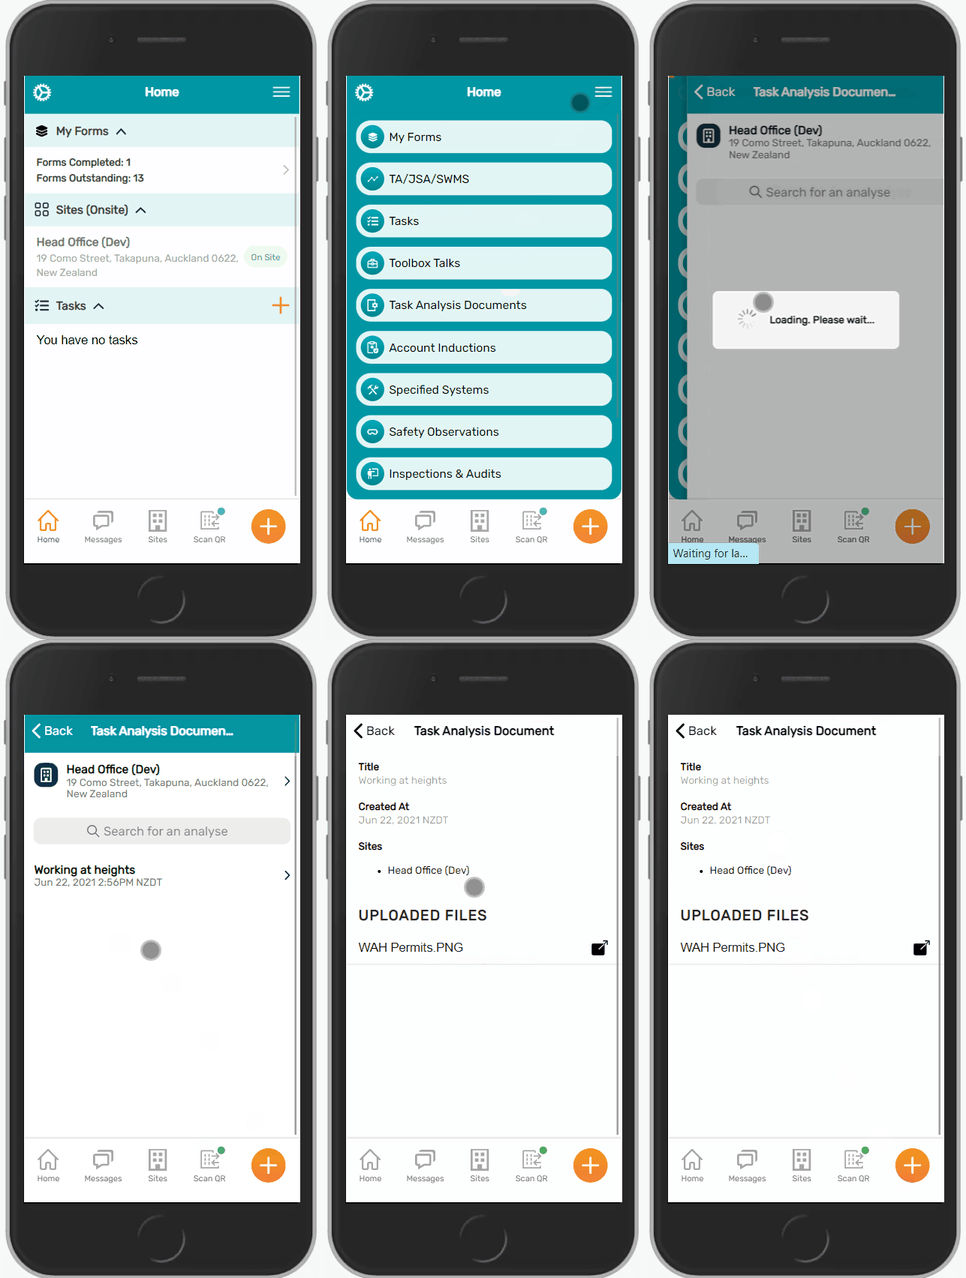
Once pressed, you can then view the file by clicking it on the next screen under Uploaded Files.
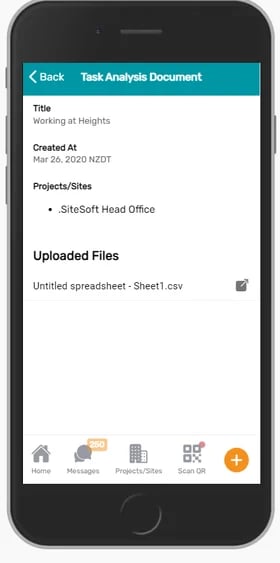
If there is no document present, then your account admins will need to be contacted and they will need to add the document on their end.
If you need any further help or have any questions please contact the support team by email siteconnectsupport@sitesoft.com or Ph: 0800 748 763