Index:
- How to add a document to a site
- How to add a document from the Document templates
- How to remove a document
- How to remove a Site
Please see the below video to learn how to add and manage Project/Site documents within SiteConnect:
Adding & Removing Site Documents (2:36)
If you now need further assistance then please read on...
Email reminder notifications for expiring account-level and site-level documents will be sent at the following intervals: 28 days and 7 days before expiry, on the day of expiry, and again 7 days and 28 days after expiry if the document has not been updated.
These notifications will be sent to the individuals assigned through the Notification Roles feature.
How to add a document to a Site
To add a document to a Site you need to click on Sites tab on the left-hand side of the main menu. Once you have clicked on Sites you will be presented with a list of Sites that have been loaded. Choose the Site you wish to add a document to and click on Edit on the right-hand side.

This will take you to the Site you have chosen. The name of the Site will show at the top with a list of tabs on the right hand side of the screen. Click on the Documents tab.
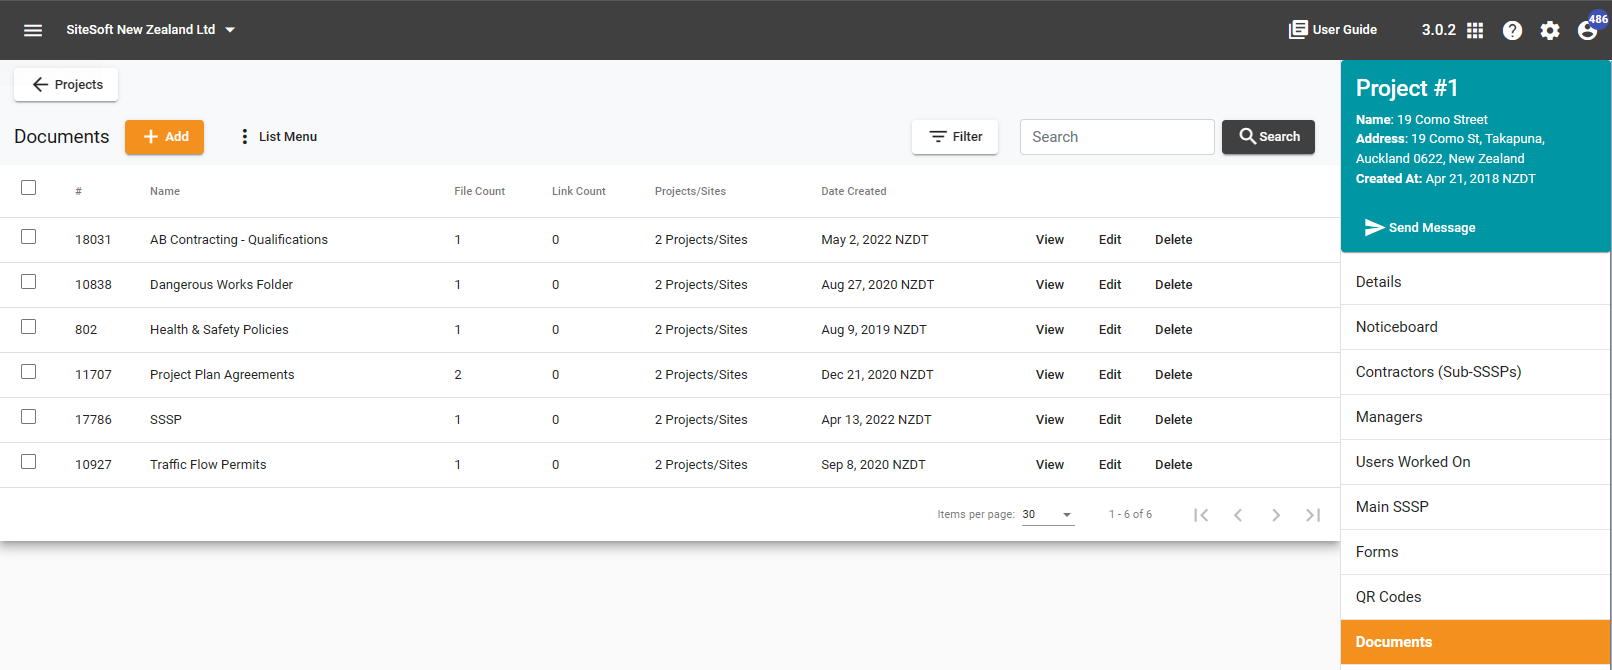
Now click on +Add Folder at the top of the page

Once you have clicked on +Add Folder a dialog box will pop up. Enter the name of your Folder, i.e. Building Consents. The select the Folder Type from the below dropdown list:
- Certificate
- Instructions
- Insurance
- Log
- Manual
- Meeting
- Minutes
- Permit
- Plan
- Policy
- Procedure
- Record
- Report
- Training
- Other
You can also set an expiry date, which is not compulsory.

Now you can upload your documents(s) by clicking on the Add File button which will allow you to upload documents from your computer or the internet.

You can upload as many documents as you like under the one Folder name
Please note: The maximum file size allowed is 24MB
The uploaded documents will then be saved against this Site. If you want to add this document to additional Sites click on Add Sites.

A new dialog box will pop up with a list of your Sites. You can either scroll through the list and click on the Sites you want to allocate this document to or you can search for a Site in the search field. Once you have selected the applicable Site(s) click on the Save & Close button.
In the top left-hand corner you will see the words Sites with a number in a bracket next to it. This indicates how many Sites you have chosen.
Once you have added your file(s) and chosen your Sites click on the Save button.

How to Add a Document from the Documents Templates

To add a document to a Site from your Account Level Document Templates you need to click on Templates Tab on the left-hand side of the main menu. Then click on Documents from the drop down menu.
Once you have clicked on Documents you will be presented with a list of Folders that have been added to the software. Choose the Folder you wish to add to the Site and click on Edit on the right-hand side.

A dialog box will be appear. Click on the Add Sites button.

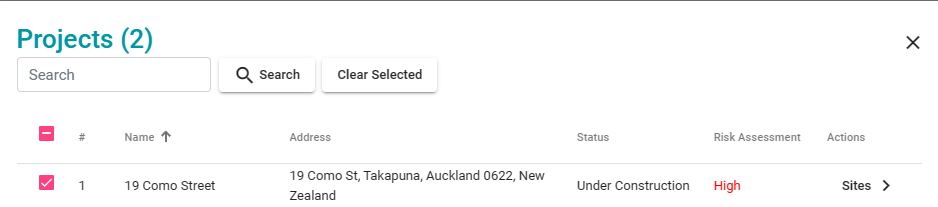
A list of your Sites will be displayed. Any Sites that are already connected to this document will have a pink box with a tick inside it next to that site.

You can either scroll through the list and click on the sites you want to allocate this Folder to or you can search for a site in the search field. Once you have selected the applicable Sites click on the Select & Close button.
How to Remove a Document
To remove the entire Folder click on Delete on the right-hand side.

Once you click on Delete a dialog box will appear. Click on Yes to remove the Folder and its contents or No if you do not want to remove the document.
To remove a document saved inside the Folder click on the Manage Files button. A list of the documents will display. Click on the Rubbish Bin icon to the right to remove the document.

How to remove a Site
To remove a Site that is connected to this Folder click on the Add Sites button.
A new dialog box will pop up with a list of your sites. You can either scroll through the list and click on the sites with a pink box and tick in it that you want to remove this document from or you can search for a site in the search field. Once you have deselected the applicable sites click on the Select & Close button.
You can also clear ALL Sites by clicking on the Clear Selected button and Select & Close. This will remove this Folder from ALL your Sites that it was applied to.
For any SiteConnect issues or questions, please contact us at support@siteconnect.io or call us on 0800 748 763 (NZ) or 1800136089 (Australia)