.png?width=161&height=26&name=SiteConnect%20Logos%20(LinkedIn%20Post).png)
Go to Assets > Vendors, select Add Vendor, enter the vendor's details, and select Save. SiteConnect adds the vendor to your Vendors list, ready to link to an asset.
To understand what Vendors are in SiteConnect, see What are vendors in SiteConnect?
At a glance
|
For |
Company administrators |
| Platform | Web Portal |
| Applies to | All regions |
| Time to Read | About 3 minutes |
| You'll learn how to |
• Add a Vendor. |
Before you begin
Make sure you have permission to manage Assets. You add and edit vendor records in the Web Portal; the Mobile App can select a vendor when editing an asset, but can't create one.
Step-by-step guide
Step 1: Open Vendors
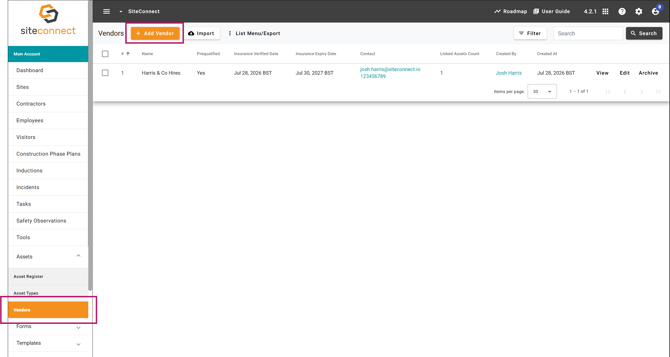
Go to Assets > Vendors, then select Add Vendor.
Step 2: Enter the vendor's details
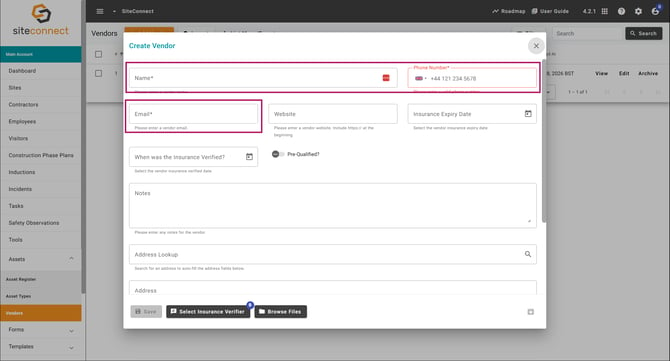
Enter the vendor's Name, Phone Number and Email — these are required. Choose the country before you enter the phone number. Website is optional, but if you add one it must start with http:// or https://.
Step 3: Add insurance and prequalification details
Enter the Insurance Expiry Date and, if you've already checked it, the date under When was the Insurance Verified? If the vendor has been prequalified, turn on Pre-Qualified? and enter the Pre-Qualified Date.
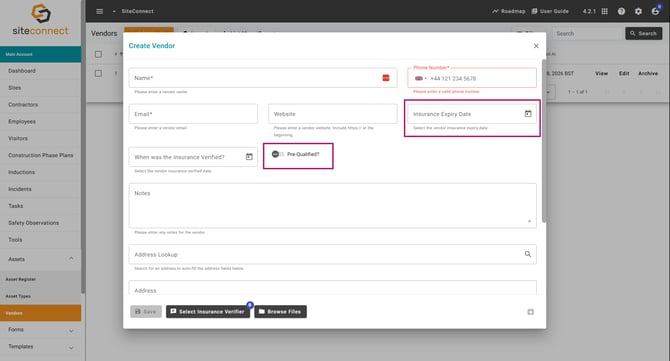
Note Insurance Expiry Date accepts future dates. When was the Insurance Verified? and Pre-Qualified Date can't be set in the future.
Step 4: Add supporting details
Optional: use Address Lookup to fill in the address, add notes, and attach files such as a certificate of insurance. Select Select Insurance Verifier to record which employee checked the insurance.
Step 5: Save the vendor
Select Save.
Result
You'll know the task is complete when the vendor appears in your Vendors list, ready to link to an asset.
Next recommended step
Link the vendor to an asset
Next article: How do I link a vendor to an asset?